|
Hello
I’m ready to shake off the old and kick off this new year with positivity and creativity! I hope you’ll join me in the challenge of sharing more joy this year.
The new January-June Mini Catalog is packed with just what you need to kick start your creative projects. If you haven’t had a chance to check it out yet, you’ll want to make a point to see some of the exciting new goodies.
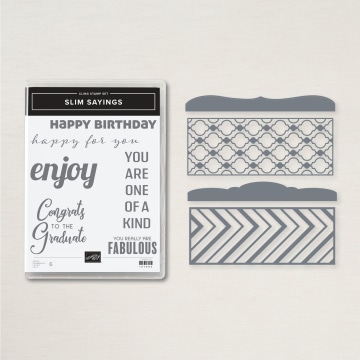
I’m so giddy about the new Slim Sayings Bundle, that I just had to use it for this month’s tutorial. I think you’ll love this fresh card style, too!
Sale-a-Bration is happening now through the end of February, so don’t miss your chance to get new goodies and earn fun bonus stamps or paper from the Sale-a-Bration brochure with your qualifying purchases or parties!
Now is a great time to create some fun with friends so join a class or contact me to host a party!
Happy Stamping,
Diane
————————
You may Shop with me using Host code MZUMWGR9
for January.
|
|
|
|
|
|
Latest Inspiration
-
Tue, January 11, 2022
…
-
Mon, January 10, 2022
…
-
Sun, January 09, 2022
…
-
Sat, January 08, 2022
…
-
Fri, January 07, 2022
…
-
Thu, January 06, 2022
…
-
Mon, January 03, 2022
…
-
Mon, January 03, 2022
…
-
Sun, January 02, 2022
…
-
Mon, November 15, 2021
…
-
Fri, November 12, 2021
…
-
Thu, November 11, 2021
…
|
|
|
|
Slim Sayings Sweet Talk Card
|
|
|
|
|
|
|
|
|
Sometimes all we need for a fresh perspective is to step out of the usual. In this case it’s a fun, new card shape! The popular slimline cards have a long, narrow design that is perfectly accented by the new Slim Card Dies. You’ll love how a new card shape sparks your imagination.
This tutorial features the Slim Sayings Bundle (#157966) and the Sweet Talk 12″ x 12″ Designer Series Paper (#157616) to make a sweet card for a fabulous friend!
|
|
|
|
|
|
|
1. Add Adhesive Sheet
|
|
Cut Real Red cardstock and Adhesive Sheet to 3-1/2″ x 8-1/2″. Peel backing off of Adhesive Sheet, line up, and adhere to back of cardstock.
|
|
|
|
|
2. Slim Die Cut
|
|
Center die cut on cardstock and run through Stampin’ Cut & Emboss. Pop the die cut pieces from the die. Set aside the negative pieces to use on the inside of the card and on other projects.
|
|
|
|
|
3. Adhere Die Cut
|
|
Cut Sweet Talk Paper to 3-1/4″ x 8-1/4″. Peel adhesive backing off of slim die cut and carefully line up on the Sweet Talk paper and adhere. Start with lining up the bottom corners and then the top corners.
|
|
|
|
|
4. Die Cut Scallop Edge
|
|
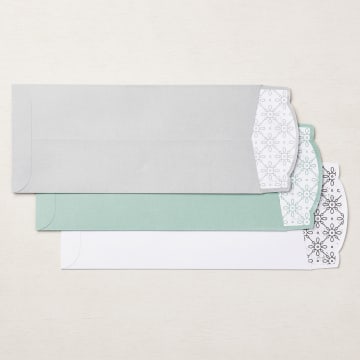
Pick a gray or white Slimline Envelope (#157981). Cut Sweet Talk paper to 3-1/2″ x 3″. Mark the center of the 3-1/2″ side and the center of the scalloped die (matches envelope flap) from the Slim Card Dies. Line up centers and die cut.
|
|
|
|
|
5. Customize Envelope Flap
|
|
Use Multipurpose Liquid Glue to adhere the die cut paper inside the envelope flap so it matches the card. You’ll Use Multipurpose Liquid Glue or Stampin’ SEAL+ to adhere you envelope flap closed when ready to mail. Note: This end-opening envelope may require additional postage. Check before mailing.
|
|
|
|
|
6. Cut Card Base
|
|
Cut Gorgeous Grape cardstock to 7″ x 8-1/2″. Score at 3-1/2″ along the 7″ side to make the slimline card base. Adhere 3-1/4″ x 8-1/4″ Basic White cardstock inside card. Add two of the negative die cut strips inside the card as accents.
|
|
|
|
|
7. Layer Card Front
|
|
Adhere the layered slim die cut and Sweet Talk to card front. Use Stampin’ Dimensionals if you want extra dimension.
|
|
|
|
|
8. Stamp & Punch Greeting
|
|
Stamp greeting with Gorgeous Grape ink on Basic White cardstock. Punch with Tailored Tag Punch (#145667).
|
|
|
|
|
9. Add Greeting & Ribbon
|
|
Cut a 4-1/2″ piece of White 3/4″ Frayed Ribbon (#158138). Pull threads on each end to fray the ribbon. Adhere to card with Multipurpose Liquid Glue or Glue Dots. Layer punched greeting onto 2-1/2″ x 1-3/4″ Bermuda Bay cardstock with Stampin’ Dimensional. Adhere over ribbon with Stampin’ Dimensionals.
|
|
|
|
|
10. Hand-cut Hearts
|
|
Hand-cut two hearts from the Sweet Talk Designer Series Paper with Paper Snips. Adhere to greeting background with Glue Dots.
|
|
|
|
|
|
 |
Slim Sayings Bundle
|
| MORE |
|
|
 |
Slimline
Envelopes
|
| MORE |
|
 |
Sweet Talk 12″ x 12″ Designer Series Paper
|
| MORE |
|
|
|
|
|
|
|
|
|
|
|
Stampin’ Up! Demonstrator
Hendersonville, NC USA
828-606-9341
dggard@bellsouth.net
www.deedeesdazzles.com
|
| VISIT MY SITE |
|
|
|
|
|
|
You have received this email because you have subscribed to my newsletter list, purchased products from me, or attended an event I hosted. If you no longer wish to receive emails please unsubscribe using the link below.
© CraftyPerson Productions | Images © Stampin’ Up! | All Rights Reserved
|
|
|
|
|