Thank you for joining us for our Stampin’ Up!® Demonstrator Training Program Monthly Blog Hop! We are so happy that you could join us today for this blog hop for ideas and creative inspiration. We are a group of Stampin’ Up!® Demonstrators from around the world that are taking part in training that is helping us to build a successful Stampin’ Up!® business and reach some goals we have set. We really appreciate your support.
You may be starting here or have come from another blog – either way you can find the link list at the bottom of this post so that you can see every blog post and idea today.
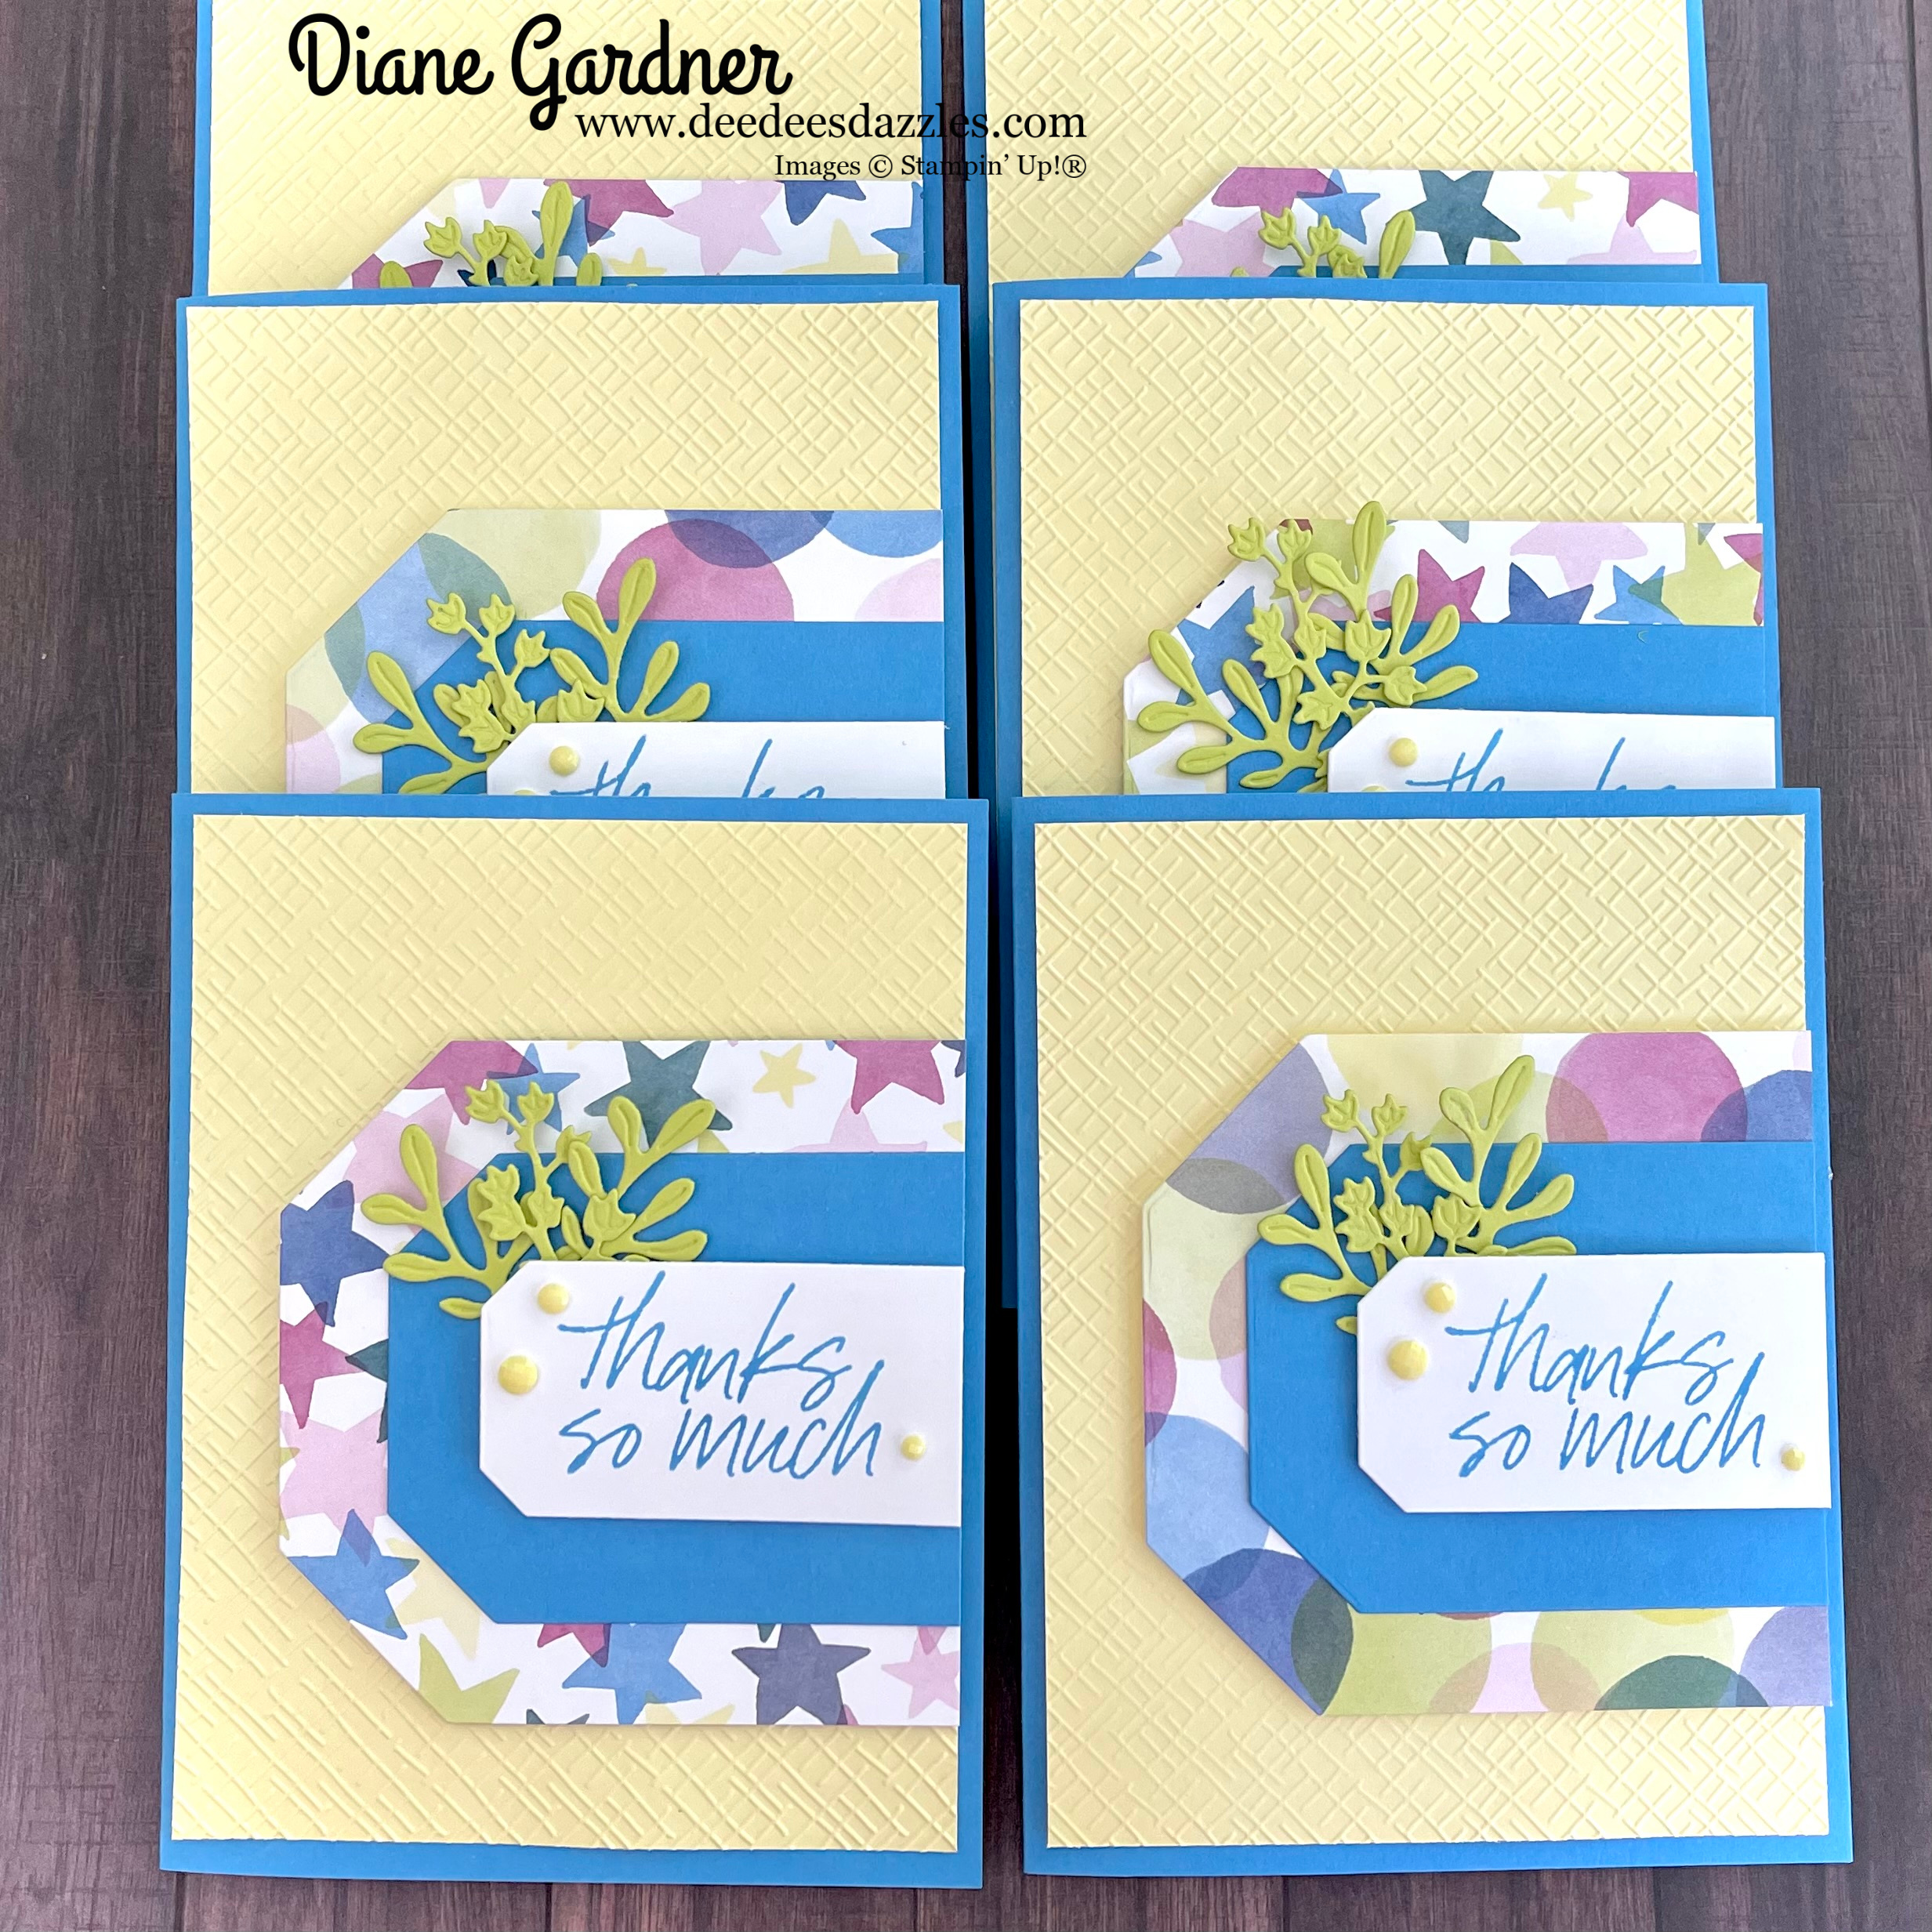
The cards were created as Thank You cards for my June 2023 Stampin’ Up! orders. I used a sentiment from the Tropical Leaf stamp set (OnLine Exclusive)and the die cut leaves are from the Lazy Days dies. I named it Tropical Leaf since that was the only stamp set that I used. The rest are dies.
1. My card base is Azure Afternoon cut to 5 1/2″ x 8 1/2″ scored at 4 1/4″. I then covered the whole card front with a piece of the Countryside Inn DSP cut to 5 1/2″ x 4 1/4″.
2. The next layer is Lemon Lolly cut to 4″ x 5 1/4″ and embossed with the Basics 3D Embossing Folder (it’s an OnLine Exclusive – comes as pack of three). Attach to card front.
3. Using the largest die in the Countryside Corners, I die cut a piece of Bright & Beautiful DSP.
4. Next using the second to largest die from Countryside Corners, I die cut a piece of Azure Afternoon.
5. Using the third from the smallest die in the Countryside Corners dies, I die cut a piece of Basic White. Depending on how you like to do it, you can stamp first and then cut or cut first and then stamp. Stamp the sentiment in Azure Afternoon. Trim so it is 2 3/8″ wide – from the left hand side.
6. Glue the DSP and Azure Afternoon pieces together, centering them up. Cut off 1 1/2″ from the right hand side. Save for the inside of our card. Attach to the card front using Dimensionals.
7. Die cut three leaves from Lemon Lime Twist, using 2 dies from the Lazy Days. Attach these to the Basic White sentiment piece.
8. Add some gems from the Adhesive Backed Solid Backed Gems.
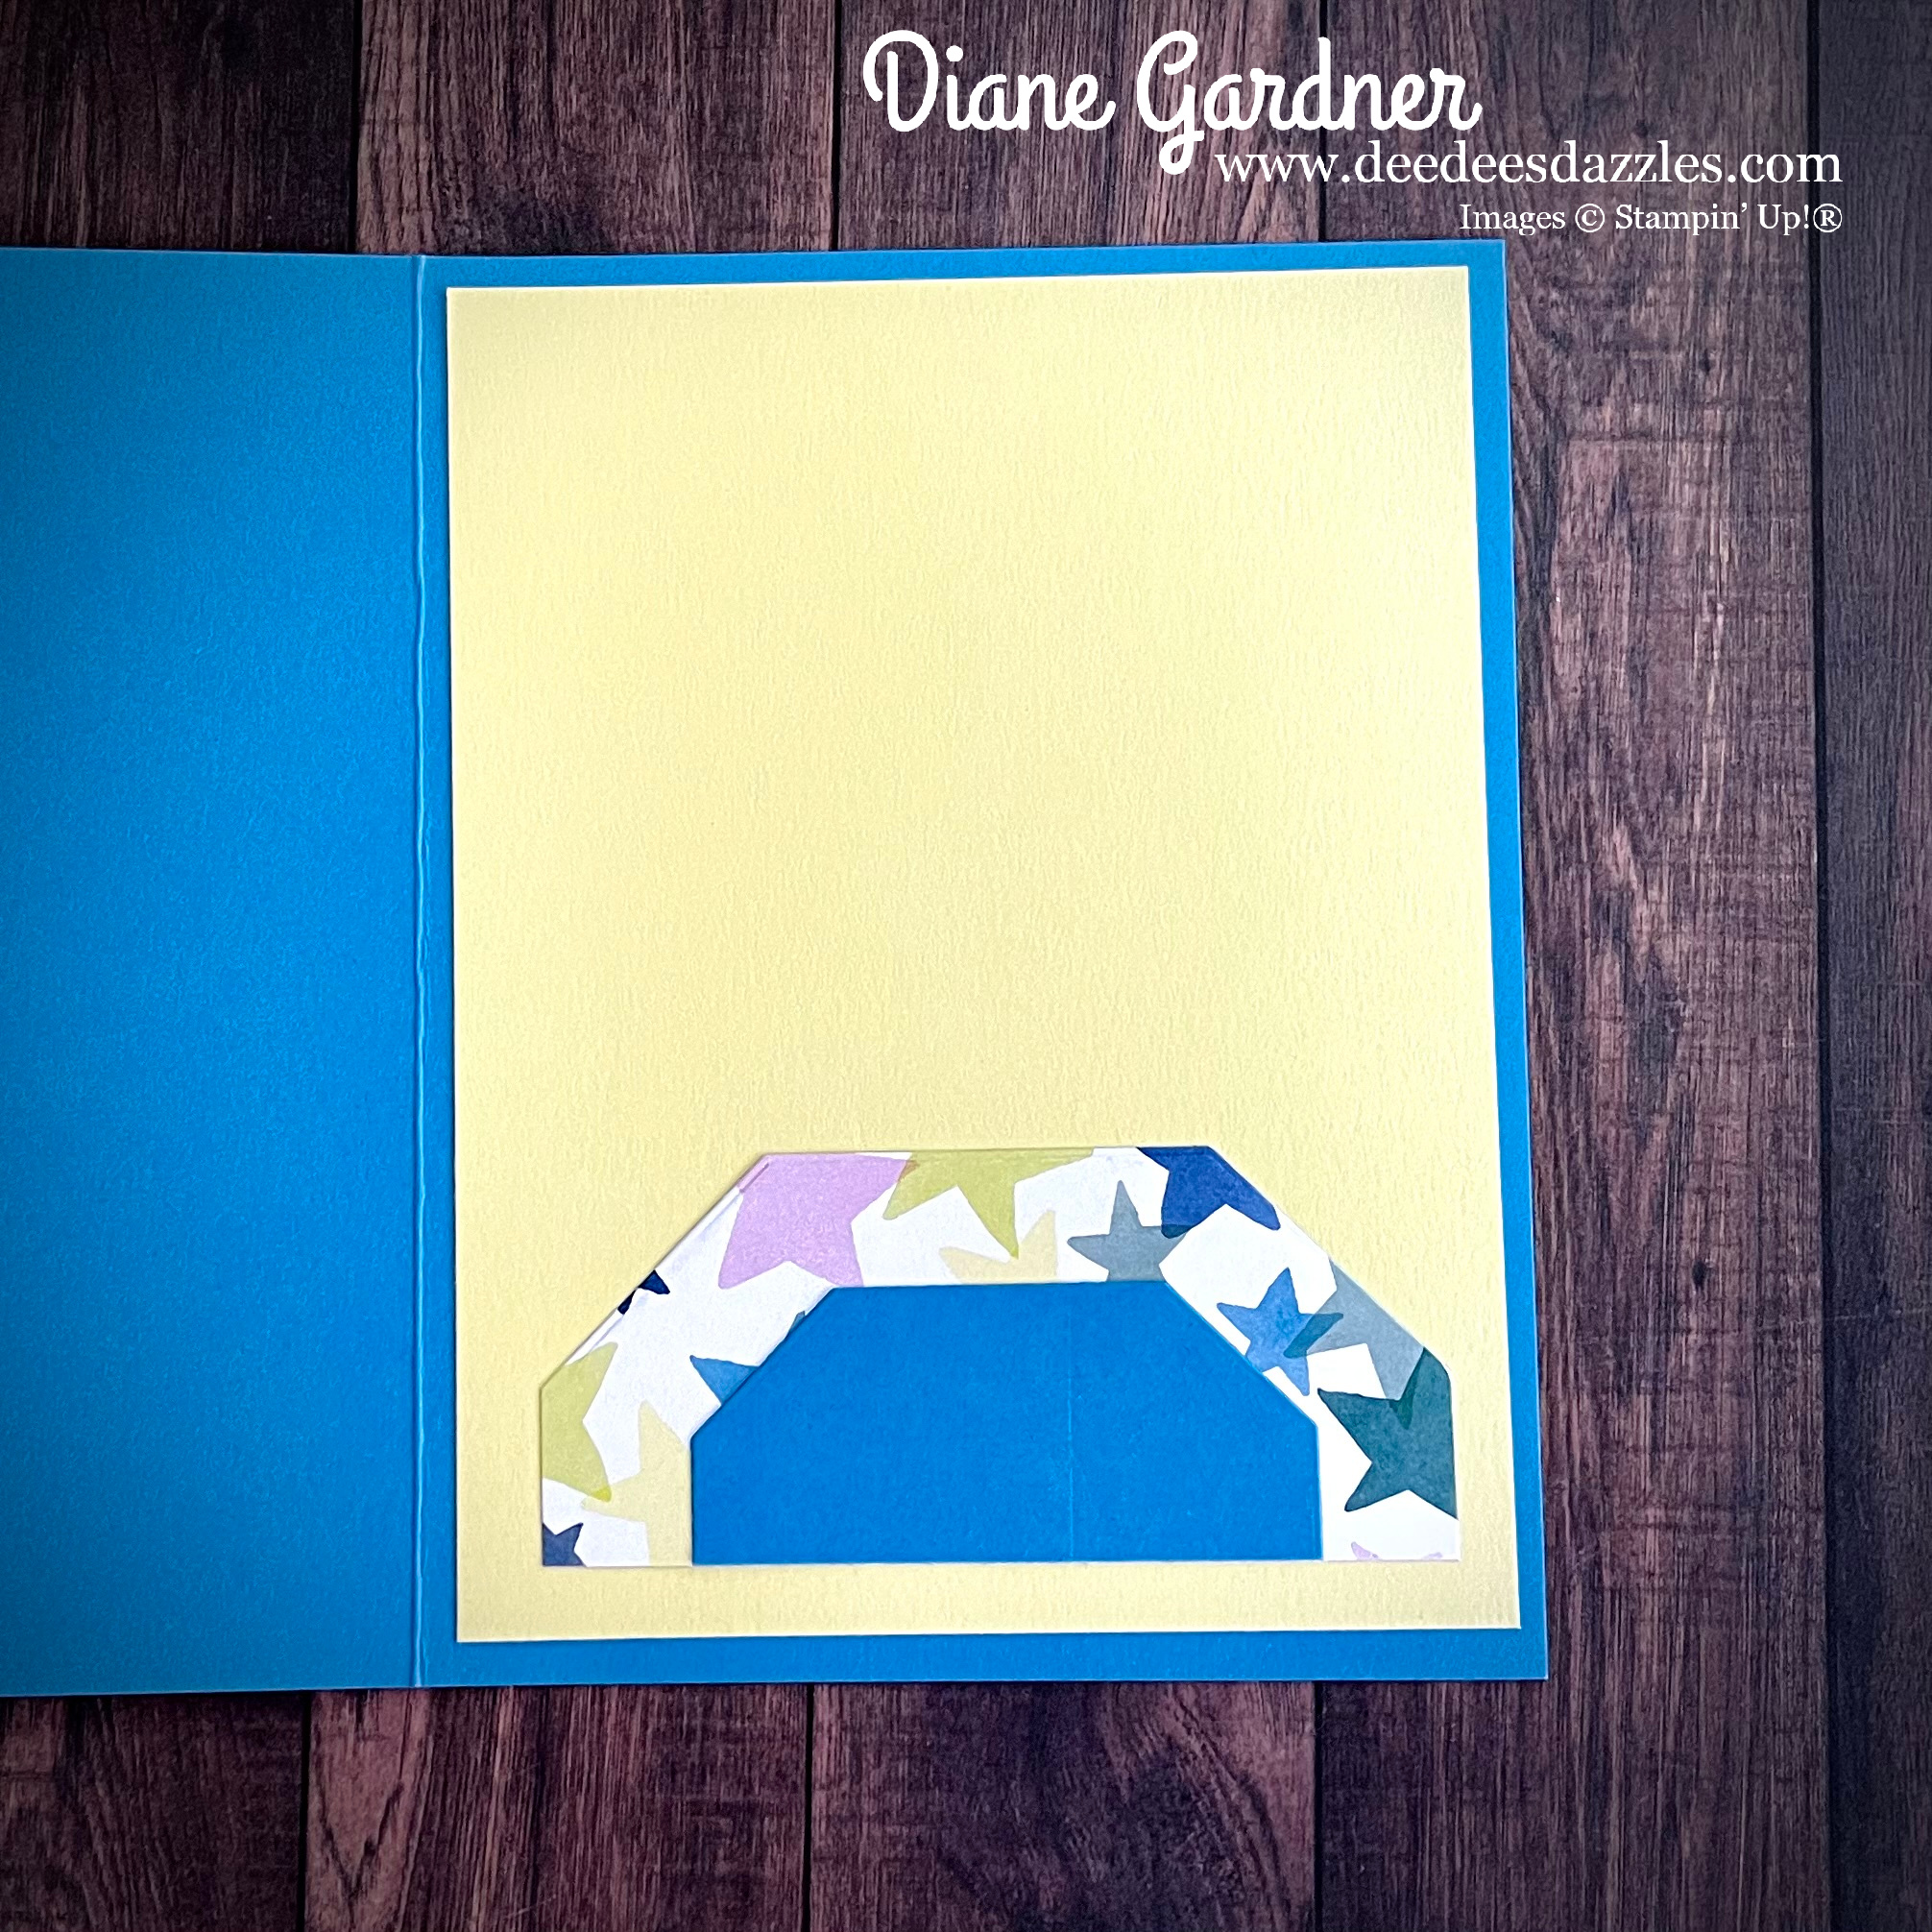
9. Attach the piece that you saved after cutting it off the die cut from the card front to a piece of Lemon Lolly cardstock 4″ x5 1/4″. See photo below. Glue to the inside of your card.
Please check out everyone’s cards on the blog hop. If you do not see the links below please click here.
Blog Hop List
Product List







Very cute
Thank you Janice!
Lovely cards Dee! Thank you for taking part in our Demonstrator Training Blog Hop this month.
Thank you Kylie!
Fabulous card!! a great way to show off the DSP and those dies!! and love how you did thr inside too!!
Thank you Christy!