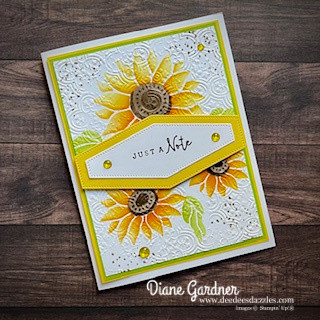
This month’s blog hop has participants from all over the world. Please check out all the blogs for great inspiration and maybe leave a comment. We made a card in last weeks classes using the Abundant Beauty Masks (stencils) and had to fussy cut the sun flowers so I wanted to create a card with these masks that you did not need to cut out the flowers. Here is my finished card.
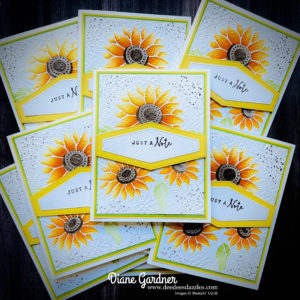
Here is a picture of all of my cards. I forgot to attach the bling until after I took the group picture, sorry.
Here is the list of blog hop participants.
- I started with a card base of Thick Basic White 11″ x 8 1/2″, scored at 4 1/4″ and folded and burnished.
- Next is a layer of Daffodil Delight cut to 5 1/4″ x 4″.
- Then a layer of Granny Apple Green cut to 5 1/8″ x 3 7/8″.
- Attach these 3 together.
- Next is Basic White piece cut to 3 3/4″ x 5″.
- Using the masks, #1 and Daffodil Delight ink, brush on the ink in a circular motion with a Blending Brush.
- Next using the same mask, brush on some Pumpkin Pie ink near the flower center.
- The leaves are next. Using the #2 mask and Granny Apple Green ink, brush the leaves.
- Using mask #3 and Early Espresso brush ink onto the centers. These are light.
- Next using mask #4, brush on more Early Espresso ink.
- Stamp some dots in the corners using Early Espresso. Use any stamp set you own that has the dots. I used Layering Leaves.
- Run the whole stamped piece thru the Stamp, Cut and Emboss Machine with the Distressed Tile Embossing Folder. Attach to the card front.
- Stamp using Early Espresso ink the sentiment from Darling Details on Basic White. Then die cut using the Nested Essentials dies.
- Die cut Daffodil Delight with the next bigger die from the Nested Essentials die.
- Attach the two die cuts together and attach to card front with dimensionals.
- Add some bling – look for it on the individual picture.
Thanks for stopping by,

Shop your Stampin’ Up! Supplies with me.
Join my Team for ongoing discount. Find out more here.
