| Watercolor Wash Technique |
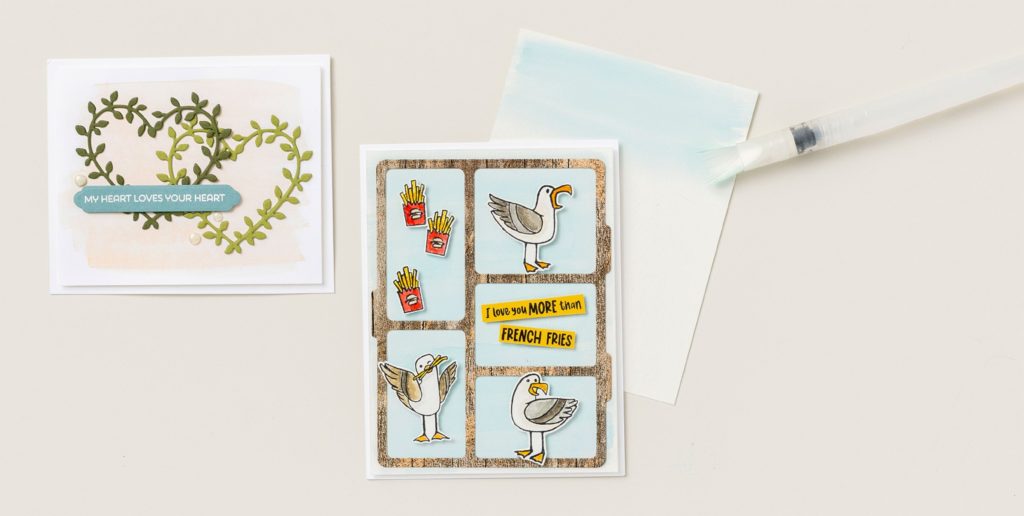
| At first glance, these two cards might look like they have nothing in common. But upon closer inspection, you’ll notice the artist CASE-d a technique—both cards use a watercolor wash background. Creating a watercolor wash background is simple, and it’s a great way to add a pop of color to your projects. You’ll need an ink pad or ink refill, a Water Painter or paintbrush, and a piece of cardstock or watercolor paper—we recommend watercolor paper. Our artist also recommends using the Water Painter with a flat brush or a flat paintbrush. If you’re using an ink pad as your source of paint, squeeze the case before opening it to transfer some ink to the lid. Or you can add a few drops from an ink refill to a nonporous surface. Wet your brush, then pick up some ink and brush it back and forth across the watercolor paper. Don’t worry if you see the brushstrokes—that just adds interest and visual texture to your project. To complete the seagull card, the artist die-cut the tackle box frame from the Country Woods Designer Series Paper using the Gone Fishing Dies. Then she stamped the seagulls, French fries, and sentiment from the Friendly Seagulls Stamp Set using black StazOn ink, which won’t smudge when wet. She watercolored the seagulls and French fries using the smaller pointed Water Painter, and then fussy cut them and the sentiment. She assembled the card using Stampin’ Dimensionals to adhere the seagulls, fries, and sentiment in the different compartments of the tackle box frame. Next time you’re looking for inspiration, try CASE-ing a technique like the watercolor wash background. |
